Fill up your winter days with fun and creative snowflake themed activities-- like this Snowflake Geoboard!
I'm all for crafting or learning about snow INside ; ) Our latest activity is the perfect way to add a little bit of creativity to your day. It also integrates engineering and math skills, so count this as a snowy day STEM idea.
post contains affiliate links.
STEM or STEAM seems to be the latest hot topic in education. It's simply the combination of Science, Technology, Engineering, {Art}, and/or Math concepts in an activity.
Winter STEM Activity for Kids
Our Snowflake Geoboard combines Engineering {design} and Math {symmetry}, but it's a great way to also add in some non-fiction books to learn more about the wonder of snowflakes.
Supplies to Build Your Own Snowflake:
If you need, draw out a rough snowflake design on a sheet of paper. Remember that snowflakes are symmetrical, so may be helpful to design one side of your snowflake first and then copy the design on the other side.
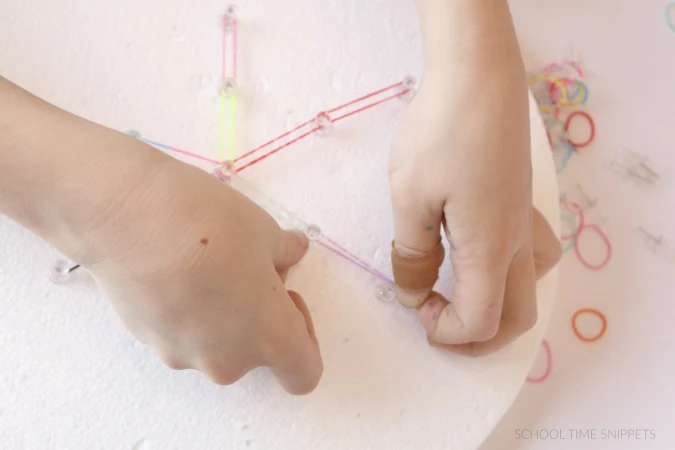
Once you have an idea of what your snowflake should look like, create the design with push pins on the styrofoam circle.
I placed my push pins about an inch or so apart.
Once the push pins are in place, begin adding the loom bands to connect the push pins.
Young or old, this is a great way to sneak in some fine motor skills work!
If your gap between push pins is too great, simply add in another push pin.
Continue to connect push pins with loom bands until your snowflake design is complete!
Our stryofoam circle was probably about 12''. Big Brother and I both created a snowflake, but this project would have been neat to create on smaller stryofoam circles, so that we could have displayed each of our snowflake geoboards!
Just like real snowflakes, our geoboard snowflakes were each unique and different!


